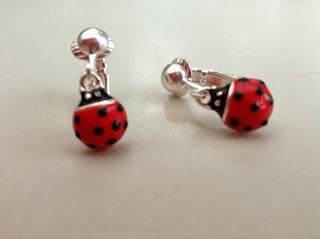
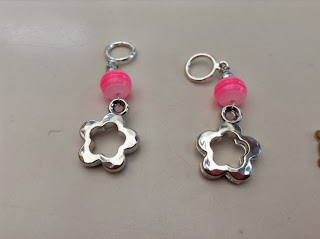
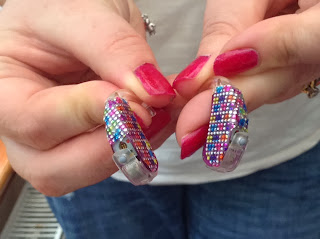
My mum just made these very quickly, with an old pair of earrings:
Hello! My name is Zizi and I'm 10 years old.
I love making decorations for my hearing aids.
Here I am going to teach you how to make your own decorations!
I will teach you to make dangling charm decorations, and also twisty decorations that go around the tubes.
Also, I will tell you how I use beads and stickers to decorate my aids.
Some of the decorations are easy to make, but some are difficult and you will need a grown-up to help you.
My mum and dad help me make my decorations for my hearing aids.
Monday, 30 September 2013
Sunday, 29 September 2013
Twists and ladybirds
Here are the ladybirds decorations that I showed you yesterday. I also made some Fimo twists, and I varnished it with a special Fimo varnish my mum got on the internet.
The twists look really nice and shiny! I also tried sticking some little gems onto the twists. It was difficult, I had to use tweezers:
To start with it looked really nice, and I took this picture,
but the next morning they all fell out. So now I have to think about a different way of sticking the little gems.
Saturday, 28 September 2013
Ladybirds
Look at my crab apple tree, it has lots of red apples.
Yesterday we made lots of new things. With some earrings from Claire's I made some lady bug decorations for my hearing aids.
My mum separated the lady bird from the earring,
and I made the decoration using the method I explained here,
I hope you like them! I am going to wear them today.
Sunday, 22 September 2013
More twisters... and lots of other things!
Yesterday a little friend visited, and we spend the afternoon making decorations for our hearing aids. We made some more twisters with Fimo, like these,
and these,
and these:
We also made some dangling charm decorations,
and my friend's mum brought some fantastic nail foils, and I tried them for the first time! They are great:
and these,
and these:
We also made some dangling charm decorations,
and my friend's mum brought some fantastic nail foils, and I tried them for the first time! They are great:
Saturday, 21 September 2013
Tutorial - twister decorations
You put them close together like this,
and you roll them gently with your hand so they stick:
this is what you get to start with:
Roll it more thinly,
and curl it gently around a crochet hook.
Bake them in the oven at 110C for 20 min, and that's it! You can also make them in solid colors, or twisting two colours together like this:
Friday, 20 September 2013
Rainbow twister decorations
The Fimo arrived and we made some twisting decorations yesterday!
This is what they look like, I hope you like them!
They are really easy to make.
I will be posting a tutorial tomorrow.
Sunday, 15 September 2013
Tutorial - Difficult tube decorations
Yesterday we went to the beadshop near where we live. We bought lots of things to make decorations for my hearing aids. My daddy wanted to make something to go on the tubes and he made these:
If you want to make something similar this is what you need: beads, wire and small pliers (and a stick or something the same thickness as your tube. We used a crochet stick).
You take a piece of wire, you thread it through the bead,
you twist the wire round itself several times,
then you add a new bead and start again.
my daddy put three beads in total. and when you have finished you wind the wire and clip off the end and tuck in the ends to make sure the are not spiky.
And this is what they look like.
Friday, 13 September 2013
Tuesday, 10 September 2013
Dreadlock twists
My mum came across some decorations that people who have dreadlocks put on their hair. They are made of Fimo. We have ordered some Fimo online, and we are going to try to make some similar twists for my hearing aids. We will tell you how it goes!
A lady called Pinkhalodesigns sells them on e-bay:
We also saw some Fimo beads for dreadlocks that look like teddy bears and little pigs. We are going to try to make those ones too for my aids.
A lady called Pinkhalodesigns sells them on e-bay:
We also saw some Fimo beads for dreadlocks that look like teddy bears and little pigs. We are going to try to make those ones too for my aids.
Skull beads
We found these skull pony beads. I gave some to my friend Robin for his hearing aids. You can also buy them in other colours like white or black. You can also buy pony beads with footballs shapes. We bought these online.
Monday, 9 September 2013
My new charms
Today I wore my new charms to school and my friend said they looked very nice. I like to wear them because I think they are really special and I am lucky that I have two sets of hearing aids, pink and purple.
Sunday, 8 September 2013
Smartie charms
We found these charms, which look like smarties,
And we made some charms for my hearing aids, they look like this:
And we made some charms for my hearing aids, they look like this:
Tutorial: Difficult star charm decoration
Today we have been making lots of decorations with stars!
This is a difficult one. My dad made them using a pair of clip-on earrings from Claire's. We also used a small toggle clasp, which we bought online. We only use the round bit of the clasp, not the stick bit. We also used some wire:
First you have to remove the decoration from the earring itself:
That leaves you with a small ring, and from that ring hung the sticks with the stars. Here is the ring:
Using some small pliers, you have to open the small ring:
It looks like this:
Then you take close the ring around the toggle clasp, like this:
And this is the end result, two hanging star decorations:
Tutorial: Easy heart charm decoration
As well as using beads, you can use charms to make decorations for your hearing aids. You can buy charms on bead shops, for example online. I sometimes go with my mum to a really nice bead shop, where the lady always helps us find the best charms.
Here are two heart charms. You will also need wire, two small silver beads, and two jump rings.
You put the wire through the hole on the bead, and fold it back:
You add the little silver bead:
And then you add the jump ring. You then fold the wire down, and twist it around itself. This is the end result. I hope you like it!
Tutorial: Star-Rainbow easy dangling decoration
You can make dangling decorations with beads. They are very easy to make. You need:
beads that you like
jeweller's wire (think one is easier to use)
jump rings (these are tiny rings that will hang the decoration from the tube of your hearing aid)
You will also need scissors, and you may find it useful to have some small pliers handy.
This is an easy decoration.
This is what you need:
1 jump ring, 1 star pony bead, 1 rainbow bead, 1 small silver bead, and some wire.
First you put the silver bead through the wire, and fold it on itself, like this:
Then you add the rainbow bead:
Then you twist the wire a bit in this way:
Then you add the star bead, and the jump ring. You then have to twist the wire a bit around itself, in this way:
You cut the bit of wire that is left over with your scissors, and this is the end result:
Subscribe to:
Comments (Atom)


